Introduction
What OpenHamClock is, where it came from, and why radio amateurs around the world run it on their shack screens.
What is OpenHamClock?
OpenHamClock is a free, open-source, web-based dashboard for amateur radio operators. Open it in any browser and you get a live, unified view of everything happening on the bands right now — DX spots, space weather, active POTA/SOTA activators, WSJT-X decodes, satellite passes, rig frequency, and much more — all on one screen, updating in real time.
Unlike traditional shack software that locks you to a single computer, OpenHamClock runs as a small server you install once (on a Raspberry Pi, a spare PC, or in the cloud) and then open on any device — a tablet on the operating table, a second monitor, a phone, or even a wall-mounted display in the shack. No installation needed on each client; just a browser.
The hosted version at openhamclock.com lets you explore the full dashboard with no sign-up and no installation. Enter your callsign and grid square and you're live in under a minute.
History & the Original HamClock
The inspiration for OpenHamClock is HamClock, the well-loved shack clock and propagation display written by Elwood Downey, WB0OEW. HamClock runs as a standalone C application directly on a Raspberry Pi screen and has a devoted following among DXers and contest operators for its clean readability and zero-dependency design.
OpenHamClock was created by Chris Hetherington, K0CJH, as a complete reimagining of that concept for the modern web. Rather than a single-screen C program, OpenHamClock is built as a React + Node.js application — 30+ independent panels, six layouts, five themes, sixteen language translations, and a plugin system for map layers. Where WB0OEW's HamClock is elegant minimalism, OpenHamClock aims for depth: every piece of data a serious DXer, contester, or POTA activator could want, in one place.
Both tools happily co-exist, and many operators run them side by side.
Who Is It For?
🎯 DXers
Real-time DX Cluster spots colour-coded by band, a one-click path from spot to map to radio tuning, great-circle bearings, and rare DXCC expedition alerts. Everything you need to chase the next new entity without switching windows.
🏆 Contest Operators
Active contest calendar, band condition indicators, live spot flow, and PSKReporter coverage. Know which bands are open before you spin the dial.
🏔️ POTA & SOTA Activators
Live activator lists for Parks on the Air, Summits on the Air, WWFF, and WWBOTA, with map markers showing exactly where each operator is transmitting.
📡 Digital Mode Enthusiasts
Live FT8, FT4, JT65, and WSPR decodes from WSJT-X, PSKReporter receive maps, RBN skimmer reports, and WSPR propagation heatmaps — all in real time.
🛰️ Satellite Operators
SGP4 real-time orbital tracking for 40+ amateur satellites. See pass windows, Doppler shift, range, and footprint overlaid on the world map.
🆘 EmComm Operators
A dedicated Emergency Communications layout with APRS-IS tracking, NWS weather alerts, FEMA shelter maps, net check-in rosters, and resource aggregation tokens.
Even if you are brand new to amateur radio, OpenHamClock is a great learning tool. Watching real DX spots appear on the map, seeing space weather indices change as a solar flare passes, or tracking an ISS pass overhead makes the hobby tangible in a way textbooks cannot.
Feature Overview
OpenHamClock ships with more than 30 independent panels. Here are the main sections covered in this manual:
At a Glance
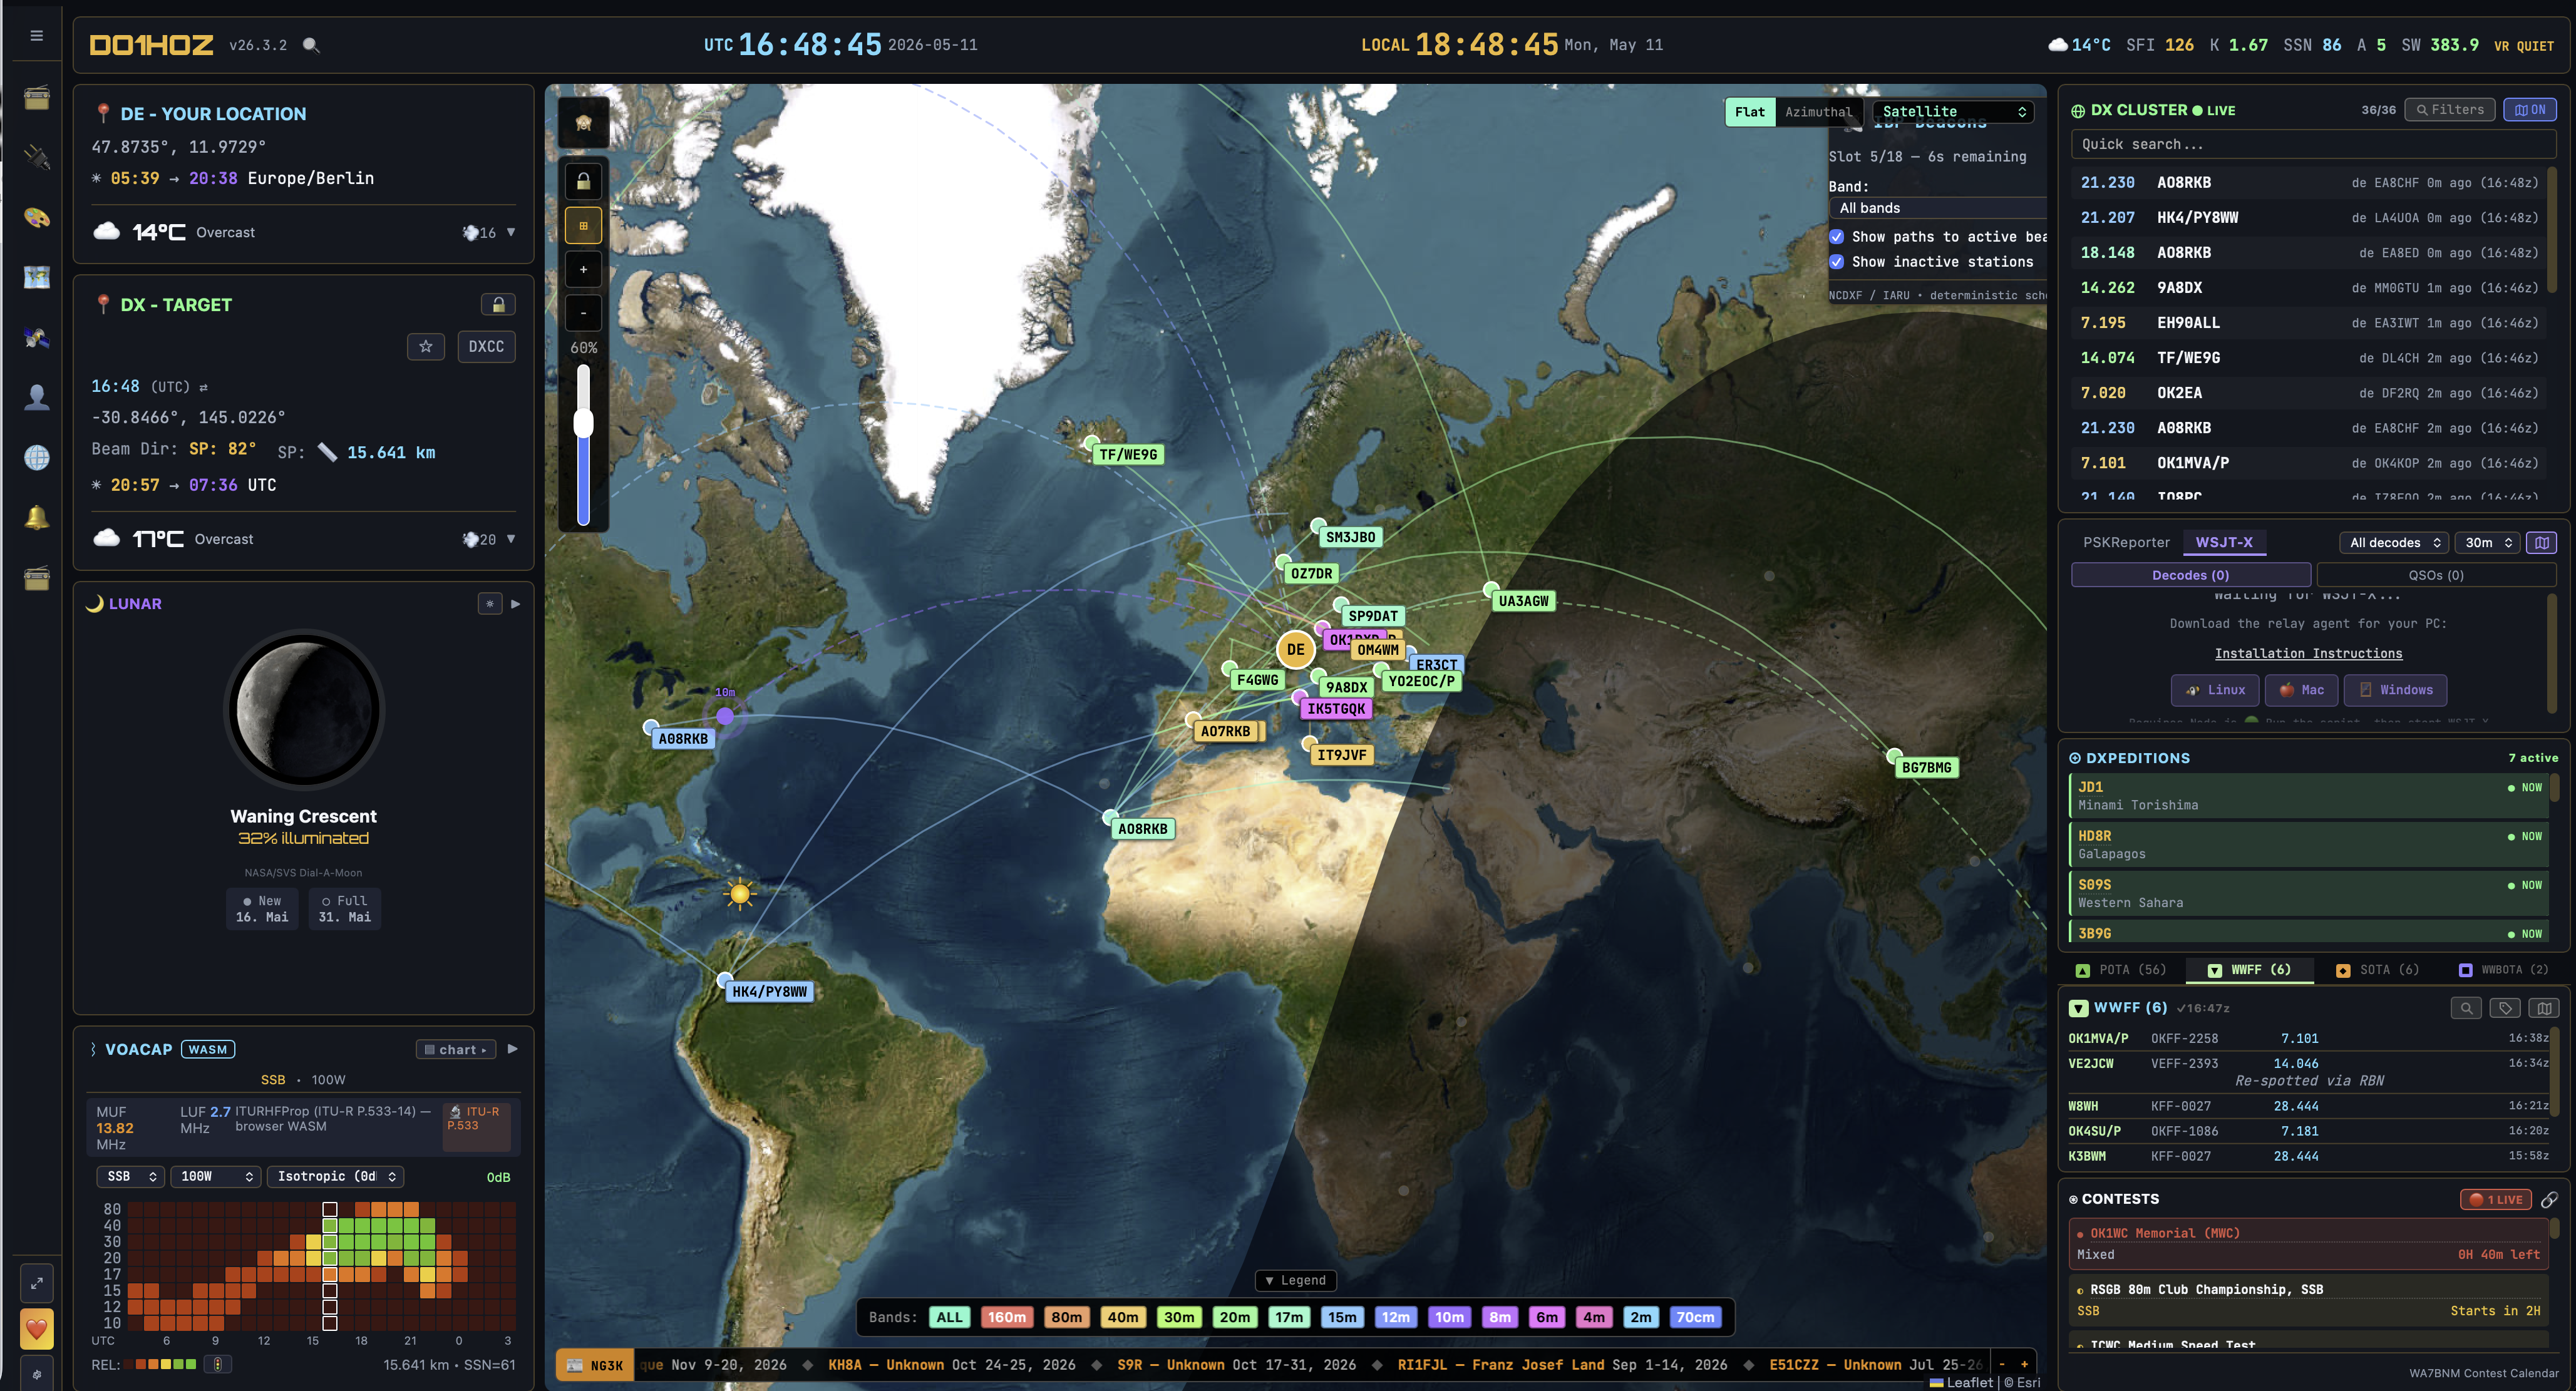
The Dashboard
The default Modern layout places the world map in the centre, DX spots and propagation data on the left, and POTA/SOTA, space weather, and rig information on the right. Every panel can be shown, hidden, or rearranged in Settings.
What You Need to Get Started
Very little. OpenHamClock runs wherever Node.js or Docker runs. The quickest paths are:
- Browser only — go to openhamclock.com, enter your callsign. Done.
- Raspberry Pi — one
curlcommand installs and configures everything, including a kiosk-mode browser that launches on boot. - Docker — one
docker compose upand you are running in under two minutes. - Windows / macOS / Linux — clone the repo, run
npm start.
Head to Quick Start to be up and running in under five minutes, or jump straight to Installation for the full platform-by-platform guide.